Form Wizard - Multi Step Form Validation
Dynamic Form - Form Wizard - Multi Step Form Validation
- Created: March-2017
- By: Hi-Tech Parks
- Email: hitechparks@gmail.com
Thank you for Browsing our website. If you have any questions that are beyond the scope of this help file please feel free to contact with us at Hi-Tech Parks. Thanks again for Browsing our website!
Explanation
Form Wizard - Multi Step Form Validation Features:
- Step by Step Form Validation
- 2/3/4/5/6/7 Steps Sign up
- 4 Different Form Formats
- 3 Form Header Styles
- 3 Form Element Styles
- 3 Form Element Layouts
- 12 Different Colors
- User Registration
- Payment Registration
- Employee Registration
- Bank Registration
- Profile Image Uploader
- Wizard With Progress Bar
- Bootstrap Responsive
- CrossBrowser Support
- CSS2/CSS3 Usage
- JQuery Usage
- Easy to Setup
- Easy to Customize
- And Much More!
Browser compatibility:

Form Wizard - Multi Step Form Validation will run in on all modern browsers. However you need JavaScript enabled to run the script smooth.
Installation
Installation Form Wizard - Multi Step Form Validation
Please follow all the steps carefully...
- Step 1: Download the Zip file which you have purchased.
- Step 2: Extract the zip file.
- Step 3: Copy all plugin CSS, JS and fonts files (you can find that's inside of customs and external folders inside of assets), and paste it your own website css, js and fonts folder.
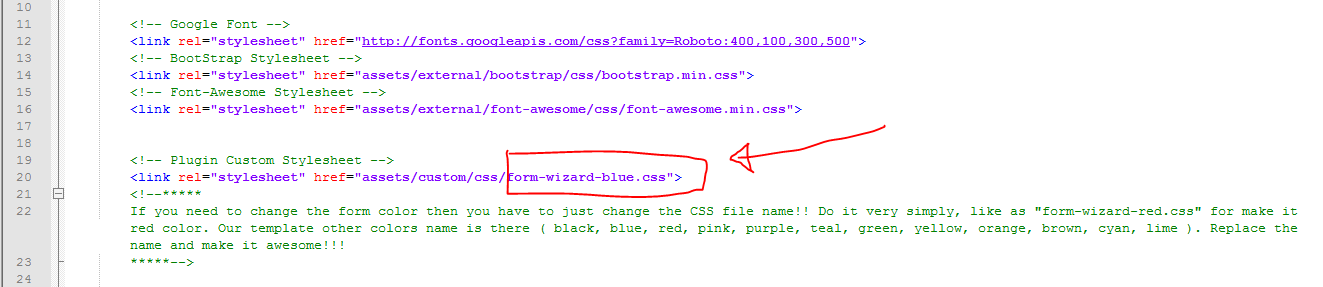
- Step 4: Link all plugin css file in your own web page head section and js file in your own web page before end of the body section (whose template page you want to add this Form Wizard).
(NB: Just copy only one form-wizard-color css file whose color you want to use. like as"form-wizard-red.css"file for red color style form.) - Step 5: Choice your Form Wizard template .html file, whose Format and Style you wont to use.
- Step 6: Edit this HTML file in Notepad / Notepad++ (you can use another code editor).
- Step 7: Copy the form content from form-wizard template and paste it where you need to show this in your website template body.
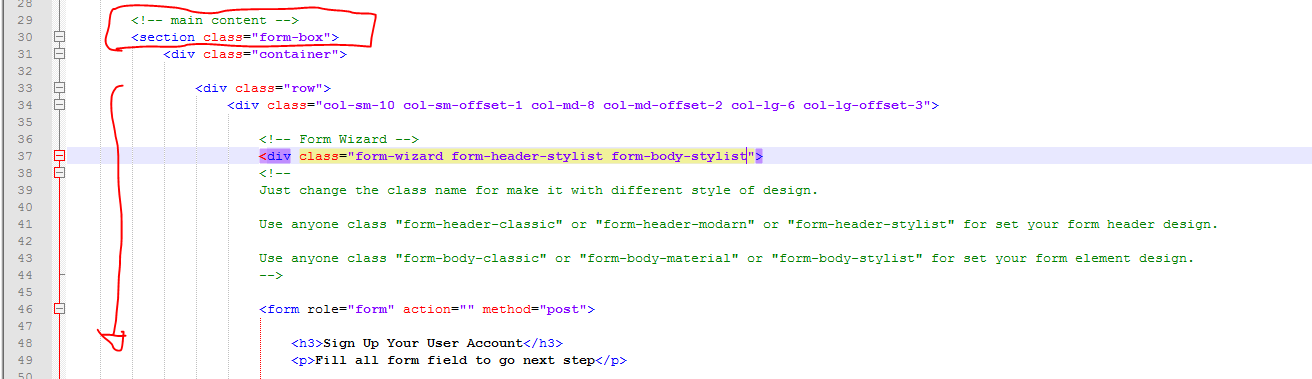
(Copy form there : Our form-wizard content srart from <section class="form-box"> and end from </section> that's commented inside of the template you can find it easily.) - Step 8: Save your own website template. It's done!
-----

Note: After setup check your template, If your design broken then please rename or delete your plugin css class, whose class was broken your design.
Customization
If you wont to customize this form-wizard color, steps, icon or etcetera then flow this instruction carefully...
- Step 01 - Change Form Color: If you need to change the form color then you have to just change the CSS file name!! Do it very simply, like as
"form-wizard-red.css"for make it red color (You can find this css file name link inside the head section). Our template other colors name are there
( black, blue, red, pink, purple, teal, green, yellow, orange, brown, cyan, lime ). Replace the name and make it awesome!!! - Step 02 - Change Form Header Style: If you need to change the form header style then you have to just change the CSS class name!! Do it very simply, like as
"form-header-classic"for make it classic header style (You can find this css class name inside the "div" of form-wizard). Our template other header style class name are there
( form-header-classic, form-header-modarn, form-header-stylist ). Replace the class name and make it awesome!!! - Step 03 - Change Form Element Style: If you need to change the form Element style then you have to just change the CSS class name!! Do it very simply, like as
"form-body-classic"for make it classic form input style (You can find this css class name inside the "div" of form-wizard). Our template other form element style class name are there
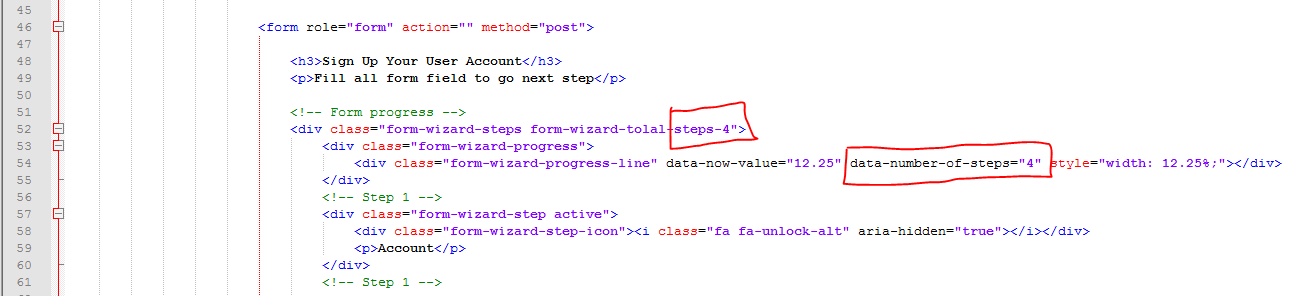
( form-body-classic, form-body-material, form-body-stylist ). Replace the class name and make it awesome!!! - Step 04 - Change Form Steps: If you need to Add or Remove some Form steps in the form-wizard then you have to do it very simply.
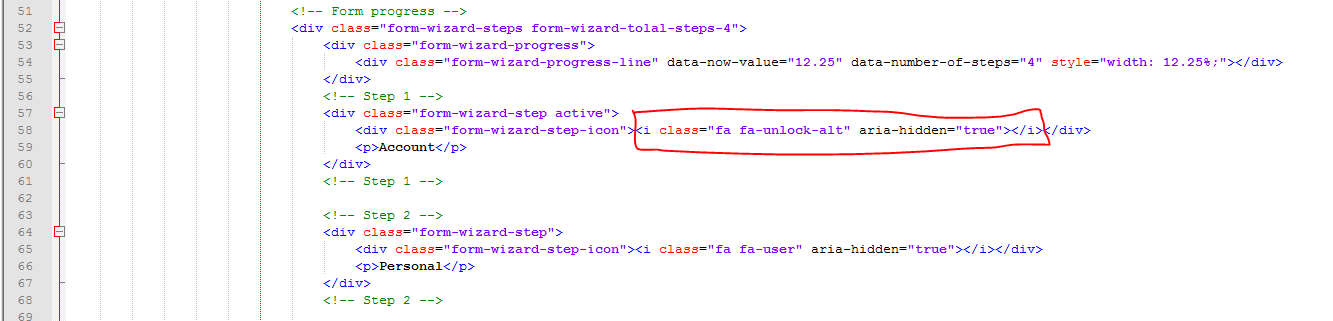
- A: Change the css class and script attribute value 4 to 2, 3, 5, 6 or 7. (You can find it inside of form progress)
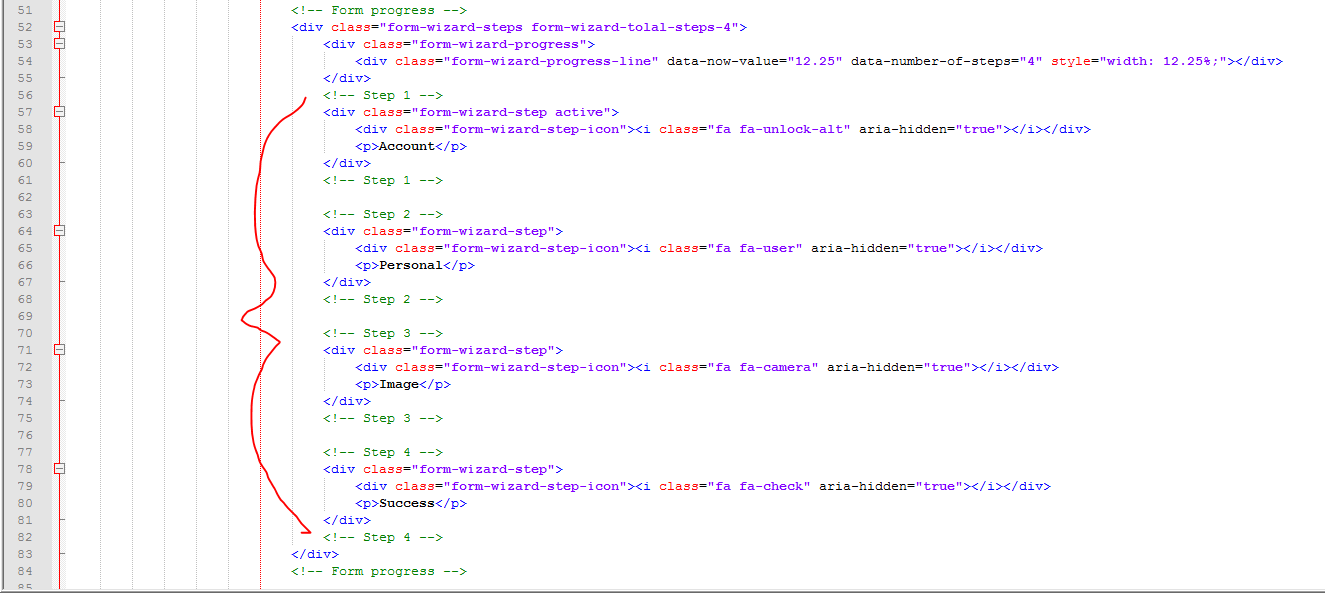
- B: Improve the form header and body step 4 to 2, 3, 5, 6 or 7. (Add or Remove some steps)
- C: Change the progress bar percentage width value and javascript attribute value inside every step of form body as you need. (You can find it top of the every form step)
(like as25%for 4 - step to50%for 2 - step or33.33%for 3 - step or20%for 5 - step or16.66%for 6 - step or14.28%for 7 - step) - D: Formatting the every step of "Form Wizard" by the number like as "1 - 4" / "1 of 4" (You can find it inside the
spantag of form haeding h4 tag) - Step 05 - Change Form Element: If you need to change the Form Element then you have to use Bootstrap Framework!! Do it very simply for make it awesome!!!
- Step 06 - Change Form Icon: If you need to change the header Icon or input group addon Icon then you have to use Font Awesome Library. Do it very simply for make it awesome!!!
- Step 06 - Change Placeholder Icon: If you need to change the Input Placeholder Icon then you have to use Font Awesome Cheatsheet Library. Do it very simply for make it awesome!!!
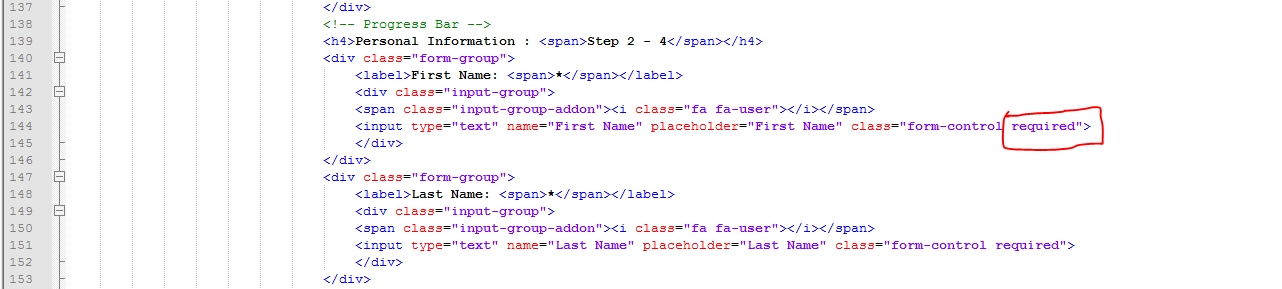
- Step 07 - Change Form Requires: If you need to update Form Requirements from the form-wizard user then you have to do it very simply.
- A: Remove or Add “required” css class from your form element for custom your user info requirement.
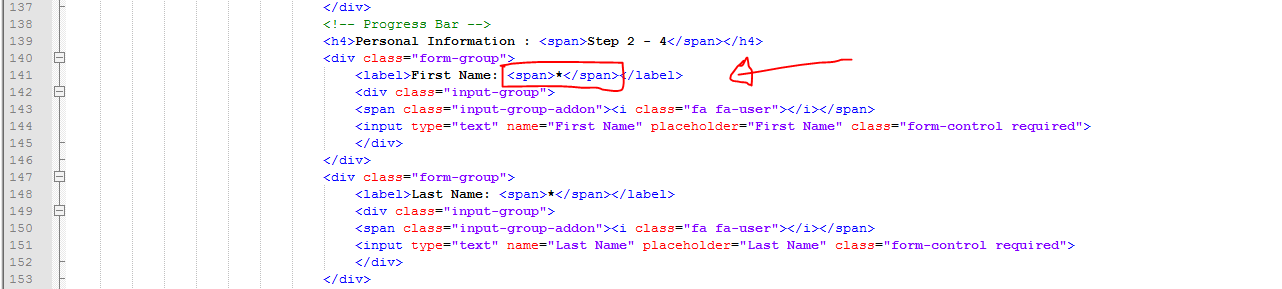
- B: Remove or Add “‹span›*‹/span›” tag from your form inside of every form label for custom your user info requirements.
- Step 08 - Submit Button: Move Submit or Done button last step of the form wizard, Just use next and previews button all form step without last step. Do it very simply for make it awesome!!!
- Step 09: Now save it. Let's go It's ready to use!


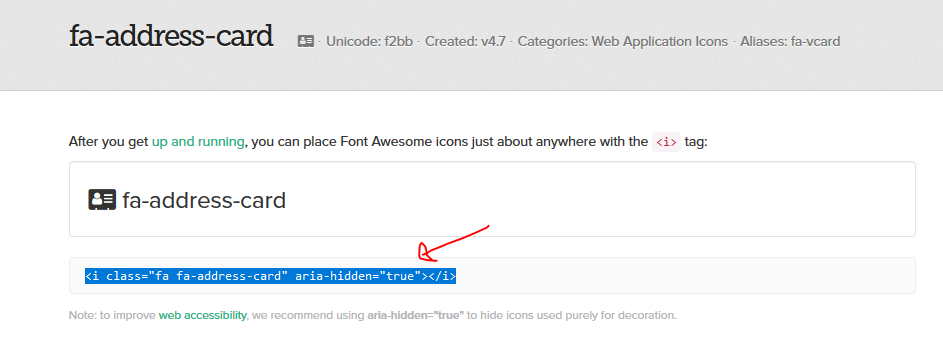
A: Go to the Font Awesome Library and find the icon that you need.
B: Click over the icon and get the iconic code below the sambol.
C: Just copy this code and paste it inside the step of header or input group addon area.
-----
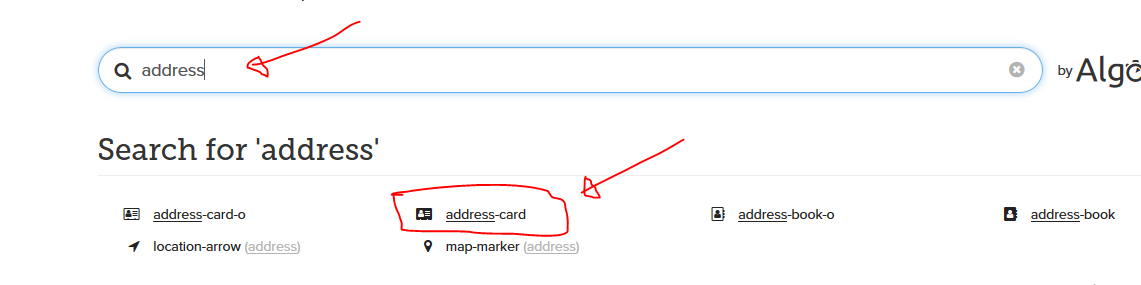
A: Go to the Font Awesome Cheatsheet Library and find the icon that you need.

B: Just copy this Cheatsheet code and paste it inside input tag like a
placeholder="cheatsheet code" value.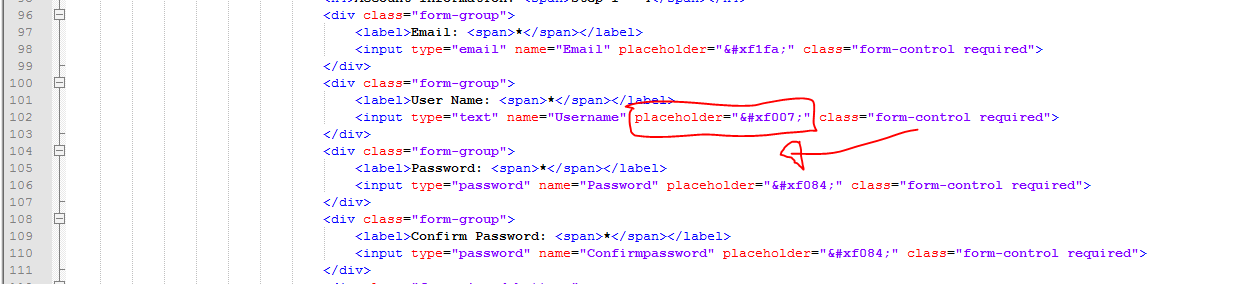

How To Use
02. Press Next button to go Next step

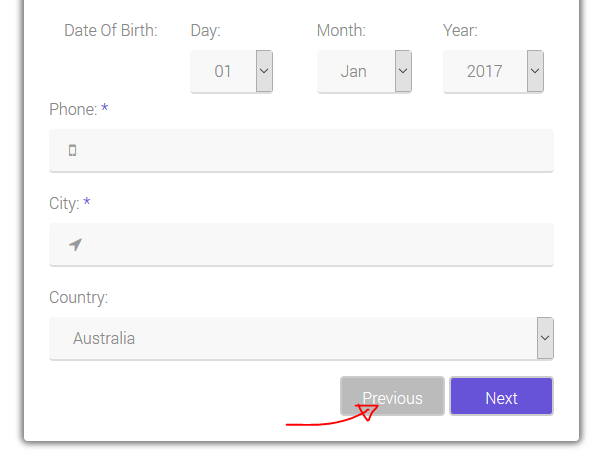
03. Press Previous button to go Back
04. Click to Upload a profile image

05. Press Done or Submit button for Submit the info

Update
Form Wizard - Multi Step Form Validation v2.1.0
Version 2.1.0 – 07 Apr 2019
- Add More Steps Option.
Version 2.0.0 – 18 May 2017
- Improved template style.
- Added more template colors.
- Made more customizable.
Version 1.3.0 – 14 Mar 2017
- Added more template style.
- Added different color template.
Version 1.2.0 – 28 Feb 2017
- JavaScript plugin issue fixed.
- Plugin CSS problem fixed.
- Some style design change.
Version 1.1.0 – 17 Jan 2017
- JavaScript strict mode fixed.
- Some style issue fixed.
Version 1.0.0 – 12 Jan 2017
- Initial release.
Support
With browsing Form Wizard - Multi Step Form Validation you will get first class support! Please feel free to contact with us by email at any time if you run into problems.
Email Us: hitechparks@gmail.comYou need to confirm your purchase from codecanyon.net to get any support.